m (Removed protection from "Nemesis") |
(→Titles) |
||
| (3 intermediate revisions by the same user not shown) | |||
| Line 132: | Line 132: | ||
| width="20%" |Akoth |
| width="20%" |Akoth |
||
| width="20%" |Amûg |
| width="20%" |Amûg |
||
| + | | width="20%" |Ar-Baruk |
||
| + | | width="20%" |Ar-Beka |
||
| + | | width="20%" |Ar-Gul |
||
| + | |- |
||
| + | | width="20%" |Ar-Kaius |
||
| + | | width="20%" |Ar-Karo |
||
| + | | width="20%" |Ar-Pratu |
||
| width="20%" |Ashgarn |
| width="20%" |Ashgarn |
||
| + | | width="20%" |Az-Adar |
||
| + | |- |
||
| + | | width="20%" |Az-Bror |
||
| + | | width="20%" |Az-Rans |
||
| width="20%" |Azdûsh |
| width="20%" |Azdûsh |
||
| − | | width="20%" | |
+ | | width="20%" |Azgrom |
| − | Bagabug |
+ | | width="20%" |Bagabug |
|- |
|- |
||
| + | | width="20%" |Bagga |
||
| width="20%" |Barfa |
| width="20%" |Barfa |
||
| − | | width="20%" |Baz |
+ | | width="20%" |Baz (Unique) |
| width="20%" |Blorg |
| width="20%" |Blorg |
||
| width="20%" |Bolg |
| width="20%" |Bolg |
||
| + | |- |
||
| width="20%" |Borgu |
| width="20%" |Borgu |
||
| + | | width="20%" |Bork |
||
| width="20%" |Brogg |
| width="20%" |Brogg |
||
| + | | width="20%" |Bruz (Unique) |
||
| − | |- |
||
| width="20%" |Bûbol |
| width="20%" |Bûbol |
||
| + | |- |
||
| width="20%" |Bûth |
| width="20%" |Bûth |
||
| + | | width="20%" |Dharg |
||
| + | | width="20%" |Dûgz |
||
| width="20%" |Dûgza |
| width="20%" |Dûgza |
||
| width="20%" |Dûsh |
| width="20%" |Dûsh |
||
| − | | width="20%" | |
||
| − | Dûshrat |
||
| − | |- |
||
| − | |Dharg |
||
| − | |Feldûsh |
||
| − | |Felgrat |
||
| − | |koax |
||
| − | |raker |
||
|- |
|- |
||
| + | | width="20%" |Dûshrat |
||
| + | | width="20%" |Feldûsh |
||
| + | | width="20%" |Felgrat |
||
| width="20%" |Flak |
| width="20%" |Flak |
||
| + | | width="20%" |Flogg |
||
| + | |- |
||
| width="20%" |Folgûm |
| width="20%" |Folgûm |
||
| + | | width="20%" |Garl |
||
| width="20%" |Ghâm |
| width="20%" |Ghâm |
||
| + | | width="20%" |Ghash |
||
| width="20%" |Ghûra |
| width="20%" |Ghûra |
||
| − | | width="20%" |Gimub |
||
|- |
|- |
||
| + | | width="20%" |Gimûb |
||
| width="20%" |Glûk |
| width="20%" |Glûk |
||
| width="20%" |Golm |
| width="20%" |Golm |
||
| width="20%" |Gorfel |
| width="20%" |Gorfel |
||
| width="20%" |Gorgûm |
| width="20%" |Gorgûm |
||
| + | |- |
||
| width="20%" |Goroth |
| width="20%" |Goroth |
||
| + | | width="20%" |Grisha |
||
| + | | width="20%" |Grom |
||
| + | | width="20%" |Grûblik |
||
| + | | width="20%" |Gruk |
||
|- |
|- |
||
| − | | width="20%" | |
+ | | width="20%" |Gubu |
| + | | width="20%" |Gûnd |
||
| width="20%" |Gûndza |
| width="20%" |Gûndza |
||
| + | | width="20%" |Hoglik |
||
| width="20%" |Horhog |
| width="20%" |Horhog |
||
| + | |- |
||
| width="20%" |Hork |
| width="20%" |Hork |
||
| width="20%" |Horza |
| width="20%" |Horza |
||
| − | |- |
||
| − | | width="20%" |Hoshû |
||
| width="20%" |Hoshgrish |
| width="20%" |Hoshgrish |
||
| + | | width="20%" |Hoshû |
||
| width="20%" |Hûmgrat |
| width="20%" |Hûmgrat |
||
| + | |- |
||
| width="20%" |Hûra |
| width="20%" |Hûra |
||
| width="20%" |Ishgha |
| width="20%" |Ishgha |
||
| − | |- |
||
| width="20%" |Ishmoz |
| width="20%" |Ishmoz |
||
| width="20%" |Kâka |
| width="20%" |Kâka |
||
| + | | width="20%" |Khrosh |
||
| + | |- |
||
| + | | width="20%" |Koth |
||
| width="20%" |Kothûg |
| width="20%" |Kothûg |
||
| width="20%" |Krimp |
| width="20%" |Krimp |
||
| + | | width="20%" |Krakhorn |
||
| width="20%" |Krûk |
| width="20%" |Krûk |
||
|- |
|- |
||
| + | | width="20%" |Kûga |
||
| width="20%" |Kugáluga |
| width="20%" |Kugáluga |
||
| width="20%" |Lamlûg |
| width="20%" |Lamlûg |
||
| width="20%" |Latbag |
| width="20%" |Latbag |
||
| width="20%" |Lorm |
| width="20%" |Lorm |
||
| − | | width="20%" |Lûga |
||
|- |
|- |
||
| + | | width="20%" |Lûga |
||
| width="20%" |Lûgdash |
| width="20%" |Lûgdash |
||
| width="20%" |Lûgnak |
| width="20%" |Lûgnak |
||
| width="20%" |Mâku |
| width="20%" |Mâku |
||
| width="20%" |Malmûg |
| width="20%" |Malmûg |
||
| − | | width="20%" |Mogg |
||
|- |
|- |
||
| + | | width="20%" |Mogg |
||
| width="20%" |Mormog |
| width="20%" |Mormog |
||
| width="20%" |Mozfel |
| width="20%" |Mozfel |
||
| + | | width="20%" |Mozû |
||
| + | | width="20%" |Mûg |
||
| + | |- |
||
| width="20%" |Muggrish |
| width="20%" |Muggrish |
||
| width="20%" |Mûglûk |
| width="20%" |Mûglûk |
||
| − | | width="20%" | |
+ | | width="20%" |Mûzglob |
| − | |- |
||
| width="20%" |Nákra |
| width="20%" |Nákra |
||
| width="20%" |Nazdûg |
| width="20%" |Nazdûg |
||
| + | |- |
||
| width="20%" |Názkûga |
| width="20%" |Názkûga |
||
| width="20%" |Nazû |
| width="20%" |Nazû |
||
| width="20%" |Norsko |
| width="20%" |Norsko |
||
| − | |- |
||
| width="20%" |Norûk |
| width="20%" |Norûk |
||
| − | | width="20%" |Ogbur |
+ | | width="20%" |Ogbur |
| + | |- |
||
| + | | width="20%" |Ogg |
||
| + | | width="20%" |Ogthrak |
||
| width="20%" |Olgoth |
| width="20%" |Olgoth |
||
| width="20%" |Olrok |
| width="20%" |Olrok |
||
| Line 224: | Line 257: | ||
|- |
|- |
||
| width="20%" |Pushkrimp |
| width="20%" |Pushkrimp |
||
| + | | width="20%" |Râsh |
||
| + | | width="20%" |Ratak |
||
| width="20%" |Ratanák |
| width="20%" |Ratanák |
||
| width="20%" |Ratbag (unique) |
| width="20%" |Ratbag (unique) |
||
| + | |- |
||
| width="20%" |Ratlûg |
| width="20%" |Ratlûg |
||
| width="20%" |Ronk |
| width="20%" |Ronk |
||
| − | |- |
||
| width="20%" |Rûg |
| width="20%" |Rûg |
||
| width="20%" |Rûkdûg |
| width="20%" |Rûkdûg |
||
| + | | width="20%" |Shag |
||
| + | |- |
||
| width="20%" |Shágflak |
| width="20%" |Shágflak |
||
| width="20%" |Shaká |
| width="20%" |Shaká |
||
| width="20%" |Skak |
| width="20%" |Skak |
||
| + | | width="20%" |Skog |
||
| + | | width="20%" |Skoth |
||
|- |
|- |
||
| width="20%" |Skûn |
| width="20%" |Skûn |
||
| + | | width="20%" |Snafû |
||
| width="20%" |Snagog |
| width="20%" |Snagog |
||
| width="20%" |Takra |
| width="20%" |Takra |
||
| width="20%" |Târz |
| width="20%" |Târz |
||
| − | | width="20%" |Thakrak |
||
|- |
|- |
||
| + | | width="20%" |Thakrak |
||
| width="20%" |Thrak |
| width="20%" |Thrak |
||
| width="20%" |Torz |
| width="20%" |Torz |
||
| width="20%" |Tûgog |
| width="20%" |Tûgog |
||
| + | | width="20%" |Tûhorn |
||
| + | |- |
||
| width="20%" |Tûkâ |
| width="20%" |Tûkâ |
||
| width="20%" |Tûmhom |
| width="20%" |Tûmhom |
||
| − | |- |
||
| width="20%" |Tûmûg |
| width="20%" |Tûmûg |
||
| + | | width="20%" |Ugol |
||
| width="20%" |Ûgakûga |
| width="20%" |Ûgakûga |
||
| + | |- |
||
| width="20%" |Ûggû |
| width="20%" |Ûggû |
||
| width="20%" |Ûkbûk |
| width="20%" |Ûkbûk |
||
| width="20%" |Ûkrom |
| width="20%" |Ûkrom |
||
| − | |- |
||
| width="20%" |Ûkshak |
| width="20%" |Ûkshak |
||
| + | | width="20%" |Ur-Dag |
||
| + | |- |
||
| + | | width="20%" |Ur-Edin |
||
| + | | width="20%" |Ur-Lasu |
||
| + | | width="20%" |Ur-Lisak |
||
| + | | width="20%" |Ur-Masi |
||
| width="20%" |Ûshbaka |
| width="20%" |Ûshbaka |
||
| + | |- |
||
| width="20%" |Ûshgol |
| width="20%" |Ûshgol |
||
| width="20%" |Uthûg |
| width="20%" |Uthûg |
||
| width="20%" |Zâthra |
| width="20%" |Zâthra |
||
| + | | width="20%" |Zog (unique) |
||
| − | |- |
||
| − | | width="20%" |Zog |
||
| width="20%" |Zogdûsh |
| width="20%" |Zogdûsh |
||
| + | |- |
||
| width="20%" |Zûgor |
| width="20%" |Zûgor |
||
| width="20%" |Zûmug |
| width="20%" |Zûmug |
||
| − | | width="20%" | |
+ | | width="20%" |Zunn |
| − | Zunn |
||
|} |
|} |
||
| Line 274: | Line 322: | ||
| width="20%" |Bag-Head |
| width="20%" |Bag-Head |
||
| width="20%" |Barrel-Scraper |
| width="20%" |Barrel-Scraper |
||
| − | | width="20%" | |
+ | | width="20%" |Battle-Master |
|- |
|- |
||
| + | | width="20%" |Beast Slayer |
||
| + | | width="20%" |Beastmaster |
||
| + | | width="20%" |Beserker Master |
||
| width="20%" |Black-Blade |
| width="20%" |Black-Blade |
||
| width="20%" |Black-Heart |
| width="20%" |Black-Heart |
||
| + | |- |
||
| + | | width="20%" |Black-Thorn |
||
| + | | width="20%" |Black Tooth |
||
| width="20%" |Blade Master |
| width="20%" |Blade Master |
||
| width="20%" |Blade Sharpener |
| width="20%" |Blade Sharpener |
||
| − | | width="20%" |Blood- |
+ | | width="20%" |Blood-Axe |
|- |
|- |
||
| + | | width="20%" |Blood-Dripper |
||
| + | | width="20%" |Blood Guzzler |
||
| + | | width="20%" |Blood-Lover |
||
| + | | width="20%" |Blood-Mad |
||
| width="20%" |Blood-Storm |
| width="20%" |Blood-Storm |
||
| + | |- |
||
| + | | width="20%" |Bloodhound |
||
| + | | width="20%" |Bloodlust |
||
| + | | width="20%" |Bloodstoker |
||
| width="20%" |Bone-Licker |
| width="20%" |Bone-Licker |
||
| width="20%" |Bone-Ripper |
| width="20%" |Bone-Ripper |
||
| + | |- |
||
| + | | width="20%" |Bone-Shaker |
||
| + | | width="20%" |Bone-Snapper |
||
| + | | width="20%" |Bootlick |
||
| + | | width="20%" |Brain Damaged |
||
| width="20%" |Brawl-Master |
| width="20%" |Brawl-Master |
||
| − | | width="20%" |Brawler |
||
|- |
|- |
||
| + | | width="20%" |Brawler |
||
| + | | width="20%" |Bright Eyes |
||
| + | | width="20%" |Broken-Shield |
||
| width="20%" |Cannibal |
| width="20%" |Cannibal |
||
| + | | width="20%" |Caragor Fang |
||
| + | |- |
||
| width="20%" |Caragor Slayer |
| width="20%" |Caragor Slayer |
||
| + | | width="20%" |Caragor Tamer |
||
| width="20%" |Cave Rat |
| width="20%" |Cave Rat |
||
| width="20%" |Corpse-Eater |
| width="20%" |Corpse-Eater |
||
| − | | width="20%" | |
+ | | width="20%" |Corpse Grinder |
|- |
|- |
||
| + | | width="20%" |Dead Killer |
||
| + | | width="20%" |Dead Wood |
||
| + | | width="20%" |Death-Blade |
||
| width="20%" |Deathbringer |
| width="20%" |Deathbringer |
||
| + | | width="20%" |Deathmonger |
||
| + | |- |
||
| + | | width="20%" |Desolation |
||
| + | | width="20%" |Discipline Master |
||
| + | | width="20%" |Drake-Killer |
||
| width="20%" |Drooler |
| width="20%" |Drooler |
||
| width="20%" |Dwarf-Eater |
| width="20%" |Dwarf-Eater |
||
| + | |- |
||
| width="20%" |Eagle Eye |
| width="20%" |Eagle Eye |
||
| + | | width="20%" |Ear Collector |
||
| width="20%" |Elf-Slayer |
| width="20%" |Elf-Slayer |
||
| − | |- |
||
| width="20%" |Evil Eye |
| width="20%" |Evil Eye |
||
| + | | width="20%" |Eye-Gouger |
||
| + | |- |
||
| + | | width="20%" |Face-Eater |
||
| + | | width="20%" |Fast Feet |
||
| width="20%" |Fat Head |
| width="20%" |Fat Head |
||
| + | | width="20%" |Fear Lord |
||
| width="20%" |Fire-Brander |
| width="20%" |Fire-Brander |
||
| + | |- |
||
| + | | width="20%" |Firebelly |
||
| + | | width="20%" |Flame Monger |
||
| + | | width="20%" |Flesh Lover |
||
| + | | width="20%" |Flesh-Lump |
||
| + | | width="20%" |Flesh-Picker |
||
| + | |- |
||
| width="20%" |Flesh-Render |
| width="20%" |Flesh-Render |
||
| + | | width="20%" |Flesh-Rot |
||
| width="20%" |Foul-Spawn |
| width="20%" |Foul-Spawn |
||
| − | |- |
||
| width="20%" |Frog-Blood |
| width="20%" |Frog-Blood |
||
| + | | width="20%" |Ghûl Keeper |
||
| + | |- |
||
| + | | width="20%" |Ghûl Lover |
||
| + | | width="20%" |Giant Slayer |
||
| width="20%" |Giggles |
| width="20%" |Giggles |
||
| + | | width="20%" |Gold-Fang |
||
| + | | width="20%" |Gore King |
||
| + | |- |
||
| + | | width="20%" |Gore-Tide |
||
| width="20%" |Graug Catcher |
| width="20%" |Graug Catcher |
||
| width="20%" |Graug Slayer |
| width="20%" |Graug Slayer |
||
| width="20%" |Grog-Burner |
| width="20%" |Grog-Burner |
||
| + | | width="20%" |Grog-Maker |
||
|- |
|- |
||
| + | | width="20%" |Guard Master |
||
| width="20%" |Halfling-Lover |
| width="20%" |Halfling-Lover |
||
| + | | width="20%" |Hammerfist |
||
| width="20%" |Head-Chopper |
| width="20%" |Head-Chopper |
||
| width="20%" |Head-Hunter |
| width="20%" |Head-Hunter |
||
| + | |- |
||
| width="20%" |Heart-Eater |
| width="20%" |Heart-Eater |
||
| + | | width="20%" |Hide Skinner |
||
| width="20%" |Horn Blower |
| width="20%" |Horn Blower |
||
| + | | width="20%" |Hot-Head |
||
| − | |- |
||
| width="20%" |Hot Tongs |
| width="20%" |Hot Tongs |
||
| + | |- |
||
| − | | width="20%" |Jaws/Jitters |
||
| + | | width="20%" |Iron Arm |
||
| + | | width="20%" |Iron Mount |
||
| + | | width="20%" |Itchy |
||
| + | | width="20%" |Jaws |
||
| + | | width="20%" |Jitters |
||
| + | |- |
||
| + | | width="20%" |Keen Eye |
||
| width="20%" |Learned Scribe |
| width="20%" |Learned Scribe |
||
| + | | width="20%" |Lice-Head |
||
| width="20%" |Life-Drinker |
| width="20%" |Life-Drinker |
||
| width="20%" |Limp-Leg |
| width="20%" |Limp-Leg |
||
|- |
|- |
||
| width="20%" |Literate One |
| width="20%" |Literate One |
||
| − | | width="20%" | |
+ | | width="20%" |Lock-Jaw |
| + | | width="20%" |Longtooth |
||
| width="20%" |Lucky Shot |
| width="20%" |Lucky Shot |
||
| width="20%" |Mad-Eye |
| width="20%" |Mad-Eye |
||
| − | | width="20%" |Maggot-Nest |
||
|- |
|- |
||
| + | | width="20%" |Maggot-Nest |
||
| + | | width="20%" |Man-Catcher |
||
| width="20%" |Man-Hunter |
| width="20%" |Man-Hunter |
||
| width="20%" |Man-Stalker |
| width="20%" |Man-Stalker |
||
| width="20%" |Meat Hooks |
| width="20%" |Meat Hooks |
||
| + | |- |
||
| width="20%" |Metal-Beard |
| width="20%" |Metal-Beard |
||
| + | | width="20%" |Metal Beater |
||
| + | | width="20%" |Mountain Shaker |
||
| width="20%" |Night-Bringer |
| width="20%" |Night-Bringer |
||
| + | | width="20%" |Oath-Breaker |
||
|- |
|- |
||
| width="20%" |of Lithlad |
| width="20%" |of Lithlad |
||
| width="20%" |of the Black Gate |
| width="20%" |of the Black Gate |
||
| + | | width="20%" |of the Blackguard |
||
| + | | width="20%" |of the Maggots |
||
| width="20%" |of the Spiders |
| width="20%" |of the Spiders |
||
| + | |- |
||
| + | | width="20%" |of the Stench |
||
| + | | width="20%" |of the White Hand |
||
| + | | width="20%" |of the Wind |
||
| width="20%" |One-Eye |
| width="20%" |One-Eye |
||
| − | | width="20%" | |
+ | | width="20%" |Pain Seeker |
|- |
|- |
||
| + | | width="20%" |Pit Fighter |
||
| width="20%" |Plague-Bringer |
| width="20%" |Plague-Bringer |
||
| width="20%" |Pot-Licker |
| width="20%" |Pot-Licker |
||
| + | | width="20%" |Pureblood |
||
| + | | width="20%" |Quarter Master |
||
| + | |- |
||
| width="20%" |Quick-Blades |
| width="20%" |Quick-Blades |
||
| width="20%" |Rabble Rouser |
| width="20%" |Rabble Rouser |
||
| width="20%" |Raid Leader |
| width="20%" |Raid Leader |
||
| − | |- |
||
| width="20%" |Ranger-Killer |
| width="20%" |Ranger-Killer |
||
| width="20%" |Ravager |
| width="20%" |Ravager |
||
| + | |- |
||
| width="20%" |Raw-Head |
| width="20%" |Raw-Head |
||
| + | | width="20%" |Rock Crusher |
||
| + | | width="20%" |Rotbeast |
||
| width="20%" |Runny-Bowls |
| width="20%" |Runny-Bowls |
||
| width="20%" |Sawbones |
| width="20%" |Sawbones |
||
| Line 357: | Line 489: | ||
| width="20%" |Shaman |
| width="20%" |Shaman |
||
| width="20%" |Shield Master |
| width="20%" |Shield Master |
||
| + | | width="20%" |Skin-Peeler |
||
| width="20%" |Skull Bow |
| width="20%" |Skull Bow |
||
| − | | width="20%" |Skull-Cracker |
||
|- |
|- |
||
| + | | width="20%" |Skull-Cracker |
||
| + | | width="20%" |Skull-Lopper |
||
| + | | width="20%" |Skull-Splitter |
||
| width="20%" |Slashface |
| width="20%" |Slashface |
||
| − | | width="20%" |Slave |
+ | | width="20%" |Slave-Lover |
| + | |- |
||
| width="20%" |Slave Taskmaster |
| width="20%" |Slave Taskmaster |
||
| + | | width="20%" |Steward of the Keep |
||
| + | | width="20%" |Stone-Hive |
||
| + | | width="20%" |Stoneskin |
||
| width="20%" |Storm-Bringer |
| width="20%" |Storm-Bringer |
||
| − | | width="20%" |Sword Master |
||
|- |
|- |
||
| + | | width="20%" |Sword Master |
||
| + | | width="20%" |Taker of Heads |
||
| + | | width="20%" |Taskmaster |
||
| + | | width="20%" |the Accursed |
||
| width="20%" |the Advisor |
| width="20%" |the Advisor |
||
| + | |- |
||
| + | | width="20%" |the Agonizer |
||
| + | | width="20%" |the Alchemist |
||
| + | | width="20%" |the All-Eater |
||
| width="20%" |the Amputator |
| width="20%" |the Amputator |
||
| + | | width="20%" |the Ancient One |
||
| + | |- |
||
| + | | width="20%" |the Angry |
||
| + | | width="20%" |the Anvil |
||
| + | | width="20%" |the Armorer |
||
| width="20%" |the Assassin |
| width="20%" |the Assassin |
||
| + | | width="20%" |the Avenger |
||
| + | |- |
||
| + | | width="20%" |the Backbiter |
||
| + | | width="20%" |the Bard |
||
| width="20%" |the Beheader |
| width="20%" |the Beheader |
||
| + | | width="20%" |the Believer |
||
| width="20%" |the Biter |
| width="20%" |the Biter |
||
|- |
|- |
||
| Line 375: | Line 531: | ||
| width="20%" |the Bleeder |
| width="20%" |the Bleeder |
||
| width="20%" |the Bloated |
| width="20%" |the Bloated |
||
| + | | width="20%" |the Bloody |
||
| + | | width="20%" |the Blue |
||
| + | |- |
||
| width="20%" |the Bone Collector |
| width="20%" |the Bone Collector |
||
| width="20%" |the Bowmaster |
| width="20%" |the Bowmaster |
||
| − | |- |
||
| width="20%" |the Brander |
| width="20%" |the Brander |
||
| width="20%" |the Brave |
| width="20%" |the Brave |
||
| width="20%" |the Breaker |
| width="20%" |the Breaker |
||
| + | |- |
||
| width="20%" |the Brewer |
| width="20%" |the Brewer |
||
| width="20%" |the Brother |
| width="20%" |the Brother |
||
| − | |- |
||
| width="20%" |the Brown |
| width="20%" |the Brown |
||
| + | | width="20%" |the Butcher |
||
| + | | width="20%" |the Caragor Thief |
||
| + | |- |
||
| + | | width="20%" |the Caragor Trainer |
||
| width="20%" |the Catcher |
| width="20%" |the Catcher |
||
| + | | width="20%" |the Champion of Gorgoroth |
||
| width="20%" |the Choker |
| width="20%" |the Choker |
||
| + | | width="20%" |the Chopper (unique?) |
||
| + | |- |
||
| width="20%" |the Chunky |
| width="20%" |the Chunky |
||
| width="20%" |the Claw |
| width="20%" |the Claw |
||
| − | |- |
||
| width="20%" |the Clever |
| width="20%" |the Clever |
||
| + | | width="20%" |the Commander |
||
| + | | width="20%" |the Complainer |
||
| + | |- |
||
| width="20%" |the Cook |
| width="20%" |the Cook |
||
| width="20%" |the Corruptor |
| width="20%" |the Corruptor |
||
| width="20%" |the Coward |
| width="20%" |the Coward |
||
| width="20%" |the Crazy |
| width="20%" |the Crazy |
||
| + | | width="20%" |the Crippler |
||
|- |
|- |
||
| + | | width="20%" |the Crow |
||
| width="20%" |the Cruel |
| width="20%" |the Cruel |
||
| + | | width="20%" |the Cursed |
||
| + | | width="20%" |the Crusher |
||
| + | | width="20%" |the Dangerous |
||
| + | |- |
||
| width="20%" |the Dark |
| width="20%" |the Dark |
||
| + | | width="20%" |the Dead |
||
| + | | width="20%" |the Deathless |
||
| + | | width="20%" |the Deep Seer |
||
| width="20%" |the Defender |
| width="20%" |the Defender |
||
| + | |- |
||
| width="20%" |the Defiler |
| width="20%" |the Defiler |
||
| width="20%" |the Destroyer |
| width="20%" |the Destroyer |
||
| − | |- |
||
| width="20%" |the Devourer |
| width="20%" |the Devourer |
||
| width="20%" |the Diseased |
| width="20%" |the Diseased |
||
| width="20%" |the Disgusting |
| width="20%" |the Disgusting |
||
| + | |- |
||
| + | | width="20%" |the Dragon |
||
| + | | width="20%" |the Dreamer |
||
| + | | width="20%" |the Driver |
||
| + | | width="20%" |the Drowned |
||
| width="20%" |the Drunk |
| width="20%" |the Drunk |
||
| − | | width="20%" |the Dung Collector |
||
|- |
|- |
||
| + | | width="20%" |the Dumb |
||
| + | | width="20%" |the Dung Collector |
||
| + | | width="20%" |the Eater of Men |
||
| width="20%" |the Elder |
| width="20%" |the Elder |
||
| width="20%" |the Endless |
| width="20%" |the Endless |
||
| + | |- |
||
| + | | width="20%" |the Enraged |
||
| + | | width="20%" |the Ever-Wounded |
||
| width="20%" |the Executioner |
| width="20%" |the Executioner |
||
| + | | width="20%" |the Faithful |
||
| width="20%" |the Fanatical |
| width="20%" |the Fanatical |
||
| − | | width="20%" |the Flesh Glutton |
||
|- |
|- |
||
| + | | width="20%" |the Fearful |
||
| + | | width="20%" |the Flesh Glutton |
||
| + | | width="20%" |the Flogger |
||
| width="20%" |the Fool |
| width="20%" |the Fool |
||
| + | | width="20%" |the Forsworn |
||
| + | |- |
||
| width="20%" |the Foul |
| width="20%" |the Foul |
||
| width="20%" |the Friendly |
| width="20%" |the Friendly |
||
| width="20%" |the Funny One |
| width="20%" |the Funny One |
||
| + | | width="20%" |the Gab |
||
| + | | width="20%" |the Gambler |
||
| + | |- |
||
| width="20%" |the Gentle |
| width="20%" |the Gentle |
||
| + | | width="20%" |the Glutton |
||
| + | | width="20%" |the Gluttonous |
||
| + | | width="20%" |the Gold-Thief |
||
| + | | width="20%" |the Golden |
||
|- |
|- |
||
| width="20%" |the Gorger |
| width="20%" |the Gorger |
||
| width="20%" |the Grinder |
| width="20%" |the Grinder |
||
| + | | width="20%" |the Grizzled |
||
| + | | width="20%" |the Grog Hoarder (unique?) |
||
| + | | width="20%" |the Guardian |
||
| + | |- |
||
| + | | width="20%" |the Guardian of Mordor |
||
| + | | width="20%" |the Gut Ripper |
||
| width="20%" |the Hacker |
| width="20%" |the Hacker |
||
| width="20%" |the Handsome |
| width="20%" |the Handsome |
||
| − | | width="20%" |the |
+ | | width="20%" |the Heartless |
|- |
|- |
||
| + | | width="20%" |the Hell-Hawk |
||
| + | | width="20%" |the Hook |
||
| width="20%" |the Humiliator |
| width="20%" |the Humiliator |
||
| + | | width="20%" |the Humongous |
||
| width="20%" |the Hungry |
| width="20%" |the Hungry |
||
| + | |- |
||
| + | | width="20%" |the Hunter |
||
| + | | width="20%" |the Hurler |
||
| width="20%" |the Immovable |
| width="20%" |the Immovable |
||
| width="20%" |the Infernal |
| width="20%" |the Infernal |
||
| − | | width="20%" |the |
+ | | width="20%" |the Inscrutable |
|- |
|- |
||
| + | | width="20%" |the Iron Willed |
||
| + | | width="20%" |the Judge |
||
| width="20%" |the Killer |
| width="20%" |the Killer |
||
| width="20%" |the Kin-Slayer |
| width="20%" |the Kin-Slayer |
||
| width="20%" |the Knife |
| width="20%" |the Knife |
||
| + | |- |
||
| width="20%" |the Legend |
| width="20%" |the Legend |
||
| width="20%" |the Loaded |
| width="20%" |the Loaded |
||
| − | |- |
||
| width="20%" |the Lookout |
| width="20%" |the Lookout |
||
| + | | width="20%" |the Lucky |
||
| + | | width="20%" |the Lurker |
||
| + | |- |
||
| + | | width="20%" |the Machine |
||
| width="20%" |the Mad |
| width="20%" |the Mad |
||
| + | | width="20%" |the Maggot |
||
| width="20%" |the Man-Eater |
| width="20%" |the Man-Eater |
||
| + | | width="20%" |the Manhunter |
||
| + | |- |
||
| + | | width="20%" |the Map Keeper |
||
| + | | width="20%" |the Marauder |
||
| + | | width="20%" |the Meat Grinder |
||
| width="20%" |the Meat Hoarder |
| width="20%" |the Meat Hoarder |
||
| width="20%" |the Merciful |
| width="20%" |the Merciful |
||
|- |
|- |
||
| + | | width="20%" |the Merciless |
||
| width="20%" |the Messenger |
| width="20%" |the Messenger |
||
| + | | width="20%" |the Metal Beater |
||
| width="20%" |the Mindless |
| width="20%" |the Mindless |
||
| width="20%" |the Mountain |
| width="20%" |the Mountain |
||
| + | |- |
||
| + | | width="20%" |the Murderous |
||
| + | | width="20%" |the Noble |
||
| + | | width="20%" |the Obsessed |
||
| + | | width="20%" |the Obvious |
||
| width="20%" |the Other Twin (unique) |
| width="20%" |the Other Twin (unique) |
||
| + | |- |
||
| + | | width="20%" |the Pain Lover |
||
| width="20%" |the Painted |
| width="20%" |the Painted |
||
| + | | width="20%" |the Pathetic |
||
| + | | width="20%" |the Pickler |
||
| + | | width="20%" |the Pinch |
||
|- |
|- |
||
| + | | width="20%" |the Poet |
||
| + | | width="20%" |the Poisoner |
||
| + | | width="20%" |the Pretender |
||
| + | | width="20%" |the Prickler |
||
| width="20%" |the Proud |
| width="20%" |the Proud |
||
| + | |- |
||
| + | | width="20%" |the Prowler |
||
| width="20%" |the Puny |
| width="20%" |the Puny |
||
| + | | width="20%" |the Quartermaster |
||
| width="20%" |the Rash |
| width="20%" |the Rash |
||
| width="20%" |the Rat |
| width="20%" |the Rat |
||
| − | | width="20%" |the Raven |
||
|- |
|- |
||
| + | | width="20%" |the Raven |
||
| + | | width="20%" |the Reckless |
||
| width="20%" |the Red |
| width="20%" |the Red |
||
| width="20%" |the Relentless |
| width="20%" |the Relentless |
||
| + | | width="20%" |the Rhymer |
||
| + | |- |
||
| + | | width="20%" |the Ripper |
||
| width="20%" |the Ruinous |
| width="20%" |the Ruinous |
||
| width="20%" |the Runner |
| width="20%" |the Runner |
||
| width="20%" |the Runt |
| width="20%" |the Runt |
||
| + | | width="20%" |the Sadistic |
||
|- |
|- |
||
| width="20%" |the Savage |
| width="20%" |the Savage |
||
| Line 469: | Line 715: | ||
|- |
|- |
||
| width="20%" |the Shield |
| width="20%" |the Shield |
||
| + | | width="20%" |the Shield-Master |
||
| + | | width="20%" |the Shy |
||
| + | | width="20%" |the Sick |
||
| + | | width="20%" |the Sickly |
||
| + | |- |
||
| + | | width="20%" |the Singer |
||
| width="20%" |the Skinless |
| width="20%" |the Skinless |
||
| width="20%" |the Slasher |
| width="20%" |the Slasher |
||
| width="20%" |the Slaughterer |
| width="20%" |the Slaughterer |
||
| − | | width="20%" |the |
+ | | width="20%" |the Slaver |
|- |
|- |
||
| + | | width="20%" |the Slippery |
||
| + | | width="20%" |the Small |
||
| width="20%" |the Smasher |
| width="20%" |the Smasher |
||
| + | | width="20%" |the Smuggler |
||
| + | | width="20%" |the Sneak |
||
| + | |- |
||
| + | | width="20%" |the Snowflake |
||
| + | | width="20%" |the Soothsayer |
||
| + | | width="20%" |the Spear Master |
||
| width="20%" |the Spike |
| width="20%" |the Spike |
||
| + | | width="20%" |the Sprog |
||
| + | |- |
||
| width="20%" |the Stinger |
| width="20%" |the Stinger |
||
| width="20%" |the Stout |
| width="20%" |the Stout |
||
| + | | width="20%" |the Strangler |
||
| + | | width="20%" |the Strong |
||
| width="20%" |the Surgeon |
| width="20%" |the Surgeon |
||
|- |
|- |
||
| + | | width="20%" |the Suspicious |
||
| + | | width="20%" |the Sweet |
||
| width="20%" |the Swift |
| width="20%" |the Swift |
||
| + | | width="20%" |the Tactician |
||
| + | | width="20%" |the Tainted |
||
| + | |- |
||
| + | | width="20%" |the Tenderizer |
||
| + | | width="20%" |the Thirsty |
||
| + | | width="20%" |the Thunderer |
||
| + | | width="20%" |the Timid |
||
| width="20%" |the Tongue |
| width="20%" |the Tongue |
||
| + | |- |
||
| + | | width="20%" |the Tower |
||
| + | | width="20%" |the Tracker |
||
| width="20%" |the Trainer |
| width="20%" |the Trainer |
||
| + | | width="20%" |the Tricky |
||
| width="20%" |the Twin (unique) |
| width="20%" |the Twin (unique) |
||
| + | |- |
||
| + | | width="20%" |the Uncatchable |
||
| + | | width="20%" |the Unclean |
||
| width="20%" |the Unkillable |
| width="20%" |the Unkillable |
||
| + | | width="20%" |the Venomous |
||
| + | | width="20%" |the Vicious |
||
|- |
|- |
||
| width="20%" |the Vile |
| width="20%" |the Vile |
||
| + | | width="20%" |the Wall |
||
| width="20%" |the Wanderer |
| width="20%" |the Wanderer |
||
| + | | width="20%" |the War-Bringer |
||
| + | | width="20%" |the Warden |
||
| + | |- |
||
| + | | width="20%" |the Warlock |
||
| + | | width="20%" |the Warlord |
||
| + | | width="20%" |the Warrior |
||
| + | | width="20%" |the Wasp |
||
| width="20%" |the Watcher |
| width="20%" |the Watcher |
||
| + | |- |
||
| width="20%" |the Weak |
| width="20%" |the Weak |
||
| width="20%" |the Whiner |
| width="20%" |the Whiner |
||
| + | | width="20%" |the Whisperer |
||
| + | | width="20%" |the Wicked |
||
| + | | width="20%" |the Wild |
||
|- |
|- |
||
| width="20%" |the Wise |
| width="20%" |the Wise |
||
| + | | width="20%" |the Wrath Breeder |
||
| + | | width="20%" |the Wreck |
||
| width="20%" |the Wrestler |
| width="20%" |the Wrestler |
||
| width="20%" |Thin Bones |
| width="20%" |Thin Bones |
||
| + | |- |
||
| + | | width="20%" |Throat-Slasher |
||
| + | | width="20%" |Thunder-Bowels |
||
| width="20%" |Thunderhead |
| width="20%" |Thunderhead |
||
| width="20%" |Tree-Killer |
| width="20%" |Tree-Killer |
||
| − | |- |
||
| width="20%" |Troll Slayer |
| width="20%" |Troll Slayer |
||
| + | |- |
||
| width="20%" |Troll-Born |
| width="20%" |Troll-Born |
||
| width="20%" |Ugly Face |
| width="20%" |Ugly Face |
||
| + | | width="20%" |Vat Keeper |
||
| + | | width="20%" |Warmonger |
||
| width="20%" |Who Flees |
| width="20%" |Who Flees |
||
| + | |- |
||
| − | | width="20%" |Lice-Head |
||
| + | | width="20%" |Worm-Licker |
||
|} |
|} |
||
Revision as of 20:17, 30 May 2020
The Nemesis System.
The Nemeses (singular: Nemesis), also known as Sauron's Army, are the Uruk and Olog-Hai that have gained recognition within the Orc hierarchy. Each Nemesis has his own personality and will rise or fall within the respective social structures of the Orcs as a playthrough progresses. By defeating these notable enemies, Talion is rewarded Runes or Gear to increase the potential of his weapons and/or abilities.
Characteristics
A Nemesis is defined by many different factors:
- Names and Titles - Each Nemesis has their own unique name and title, typically representative of their overall characterization.
- Visuals - Nemeses are generated uniquely from a large pool of multiple body types and parts, hairstyles, behaviors, voices, animations, etc. The personality of a Nemesis can usually be figured out by his visuals. This customization expands in scope every time these Uruk advance up the ranks of the Army. When a Soldier becomes a Captain, he gains more fearsome weapons and armor as befitting his personality. This is further enhanced when the Captain manages to become a Warchief and/or Overlord, where he will wear even more imposing armor to befit his new status.
- Relationships - Some Nemeses may develop a relationship with other Nemeses. This usually involves a rivalry between the two Uruks, and Talion will constantly find these two doing missions against each other until one of them dies. If he proves himself worthy, a Captain can serve as the Bodyguard to a Warchief, while an Overlord does not need a Bodyguard, having control over the entire region. When a Warchief appears to face Talion, all his Bodyguards will be present at his side, although the flipside of this is not always the case; Bodyguards can be gotten alone, away from their master. In Shadow of War, Uruks and Ologs can become blood-brothers with another Nemesis, meaning that the two share a positive relationship. If Talion kills one of them, the other will seek revenge.
- Power Levels - It is power and strength that defines Uruk society; those with more power reign over those without. The higher an Uruk's Power Level, the more powerful the Nemesis is in battle. In terms of a Nemesis' acquired Traits, a low Power Level will guarantee more Weaknesses and fewer Strengths, while high Power Levels result in fewer Weaknesses and more Strengths. A Nemesis' list of Traits will change (generally losing Weaknesses and gaining Strengths) as he increases in Power. A Power Level also affects their general toughness and damage-dealing ability. The maximum Power Level, for both Captains and Warchiefs, is 20 in Middle-earth: Shadow of Mordor and 25 in The Bright Lord DLC, while the maximum Power Level for all Nemeses, including Captains, Warchiefs, and Overlords, in Middle-earth: Shadow of War is 85.
- Traits - Nemesis Traits are the various strengths and weaknesses that a Nemesis can possess. This makes each Nemesis very unique and likely requires various tactics to defeat.
- Location - The location of the Nemesis within a region. If the Nemesis is not on the map themselves, then the mission he's currently undertaking will be. If Talion dominates a Nemesis, makes them a Follower, and is fighting enemies in the nearby area, the Nemesis will join in the battle in defense of his master.
- Hierarchy - The Hierarchy refers to the Uruks' and Ologs' militaristic chain of command, with only the strongest and most powerful occupying the upper echelon:
- Overlords - Introduced in Middle-earth: Shadow of War, these Uruks and Olog-hai are the kings of the hill, sometimes literally and figuratively. Their great power allows them to rule an entire region of Mordor from their fortress, fiercely guarded by the Warchiefs they promoted themselves. They are generally considered stronger than a Warchief in order to have gained their title. The fortress they control is customized to their liking, sharing traits depending on the tribe.
- Warchiefs - Previously the strongest Uruk rank in Mordor before the forging of the New Ring. These Uruks and Olog-hai are second in strength only to the Overlords, and have the absolute loyalty of the Captains that are made their Bodyguards. These Nemeses are much tougher than the lower-ranked Captains. Unlike Captains, however, a Warchief is not in-region initially. They must be drawn out by having a dominated Nemesis bring one out through a Mission or complete a certain mission that will attract the Warchief's attention. As explained by one of their own, because a Warchief's power is fearsome to the lower ranks, should he refuse a challenge, it would display weakness, a death marker for any Uruk. Only the Captains have the notoriety to issue a Death Threat to a Warchief.
- Captains - These Uruks and Olog-hai represent the lowest tier of the hierarchy, only above a Soldier. They have proven their strength and thirst for war, and so are much more powerful than the average Uruk since they have gained special Traits that grant them increased power, however, they have also developed specific weaknesses that can be exploited. From this niche in the hierarchy, Captains that demonstrate their strength in battle can be chosen as the Bodyguard of a Warchief, serving their master with the utmost loyalty. Because of how numerous the Captains in a single region can be, these Uruk are the most dynamic in terms of personality as they are the ones who fight and complete missions to increase their power if left unaccounted. Captains can receive a Death Threat from both Soldiers and other Captains.
- Grunts - Previously called Soldiers in Middle-earth: Shadow of Mordor. The most common rank of Uruks, Goblins and Olog-hai that Talion meets in the land of Mordor. Grunts typically are the followers that a Captain & Warchief have with them when they appear, in addition to the latter's Bodyguards. If a grunt manages to accomplish great feats, such as killing the Ranger, defeating a Captain (which can also result in a new Follower on occasion), and/or takes up an opportunity, i.e. taking the empty position of a recently deceased Captain, they will enter the Hierarchy as a Captain. Any grunt is capable of becoming a Captain, so this presents a useful strategy for newly minted Nemeses and Followers to gain Power.
Ranks - The longer a Nemesis maintains or advances their position in the Army, the more missions he will complete and the more experience he will gain. This history is often indicated by the prefix of his rank:
- No prefix - Greenhorns that have only just begun their career in Mordor.
- Veteran - They've seen many things and lived long enough to tell about them.
- Elite - If there was an Uruk that was ever needed for a mission, it's one of them.
- Legendary - The Uruks that all other Uruks fear, despise, and worship, at the same time.
Advanced Class - A mechanic introduced in Shadow of War. There are ten classes, each with their special trait.
- Assassin - Lethal killer who prefer to ambush his enemies and strike them down quickly
- Beastmaster - As one with the beasts of Mordor, beasts will not attack him
- Berserker - Chaotic warrior who becomes Enraged in battle. The Berserker thrives when damaging others.
- Commander - Emboldens those who fight alongside him, enabling them to fully unleash their battle lust.
- Destroyer - An expert in explosive tactics and weaponry, the Destroyer is always equipped with bombs and mines.
- Marksman - The marksman is a specialist in ranged combat who sees farther, fired with increased accuracy, and does additional damage
- Slayer - Extremely skilled fighter. The Slayer faces his enemies straight on and overpowers them with his exceptional combat skills.
- Tank - Heavily armored fighters that withstand immense damage. The Tank can endure great pain and is capable of a second wind moments before death.
- Tracker - Seeks you out no matter where you hide, summoning reinforcements to hem you in.
- Trickster - An expert in surprise attacks and unexpected tactics that confuse and bewilder his enemies. The Trickster is difficult to predict.
Attack Type - A Nemesis' attack type Class usually characterizes their preferred weapon choice when maiming Uruks, Men, and Elves:
- Warrior - Always the first to rush into battle when it starts. They vary from scrawny to large, and everything in between. They typically carry a one-handed weapon, usually a sword or spiked club of some kind. They also posses throwing weapons that they can use against targets some distance away. They generally are able to be defeated using basic combat tactics.
- Archer - The basic long-range type. They are typically more scrawny than Warriors. Usually found on higher ground, such as watchtowers, in order to be safe from attackers as well as having a better vantage point to shoot from, otherwise, they are found either shooting down from above, or flanking Warriors to get a better angle on their targets. Arrows cannot be countered but can be dodged. As they have a markedly weaker physiology than the more melee-focused Uruks, they are easily dealt with once combat begins or can be eliminated from a distance with the bow Azkâr.
- Savage - Originally called Berserker in Middle-earth: Shadow of Mordor. Their methods are similar to Warriors, but they wield two weapons instead of one. They tend to always be of the larger of Uruk body types, and are usually covered in warpaint. When in combat, they deal much more damage and are capable of throwing their weapons at a range. Though they can be countered like Warriors, they sometimes perform a whirlwind attack that cannot be countered but can be dodged, indicated by the red marker instead of white. They cannot be attacked head-on with a low Hitstreak, else they will counter the attack, though they can be attacked freely from the back. If chosen to be attacked head-on, the Savages must be Stunned before any attacks can land on them. However, when Talion has a Hitstreak of 15 or greater, his sword attacks have attained greater speed and force, and easily penetrate a Savage's frontal defense without being countered.
- Defender - Those Uruks that made the choice of a balance of defense and offense. They are usually the largest of the Uruks encountered and wield massive shields and long, pointy spears and/or halberds. Their attacks cannot be countered but can be dodged. Jumping over them and attacking them from behind is the best tactic. The ghostly arrows from Azkar also pass straight through their shields. Shields made from wooden materials can also be destroyed after sustaining enough damage, after which they will also drop their spears, draw a sword, and become regular Warriors. When Talion's Hit Counter is at 15x or greater, his sword attacks are more forceful and will smash a Defender's shield in one hit. However, when and if a Defender becomes a Captain, he will often upgrade to a metallic shield which cannot be broken, but still vaulted over.
- Hunter - Uruks that attack with spears and surprise attacks, usually in pursuit of a beast of Mordor. These Uruks are smaller compared to the other classes, but can look threatening with all the spears and javelins they carry on their back. They tend to stand at range, behind other melee Uruks, strafing to get a better shot at their target. Like Archers, they can't take near as much punishment as melee-oriented fighters.
- Sapper - The Army's token suicide bomber. A Sapper is usually chosen from the hordes of Goblins. As their industrious minds developed the Uruks' new blasting powder, they decided to make the best use of it, and created a new kind of high explosive. Sappers typically run screaming ahead of the Uruks, the volatile explosives on their backs, wielding a torch to light them with, after which they will collide with whatever fortifications lie in their path, and reduce them to rubble, for the Warriors and Savages to climb over and attack the enemy.
- Olog-Hai - A new race of Troll that the Dark Lord has begun breeding for high-risk battles. Their size is far greater than even the tallest of Uruks, and they serve their purpose as walking mountains of muscle, wielding massive clubs that will bludgeon heads and break bones. Their large frame usually prevents the Ranger from being able to reach their necks with his sword, but their speed is not too super, and can be dodged under and around for a new advantage.
Tribes - In the wake of the New Ring's forging, the great hordes of Uruk and Olog-hai have begun organizing themselves into collectives that are based around a particular mode of warfare, in turn heavily influencing their personalities and visuals:
- Dark - Favors stealth and subterfuge. Adept at ambushes, double-crosses, and battlefield trickery.
- Terror - Obsessed with pain, inflicting or receiving it. Master torturers of Mordor, feared by all others.
- Machine - Believes in an industrial age for Mordor. Takes a mechanical approach to warfare.
- Warmonger - Takes a high reverence for warfare. Brutally straightforward, and feared for it.
- Mystic - Fanatics of the Dark Lord's black magic. Feared for their twisted curses and spells.
- Feral - Inspired by the beasts of Mordor for their savagery. Battles with the mind and ferocity of beasts.
- Marauder - Prefers plunder and feasting. Utterly sacks whatever they conquer, with nothing left behind.
DLC Additional Content has introduced two new tribes, each fully assimilated into the existing Nemesis system
- Slaughter - Revels in unprovoked bloodshed and carnage. Cannibalistic and obsessed with gore.
- Outlaw - Outcasts of normal orc society. Unpredictable scavengers that make weapons and gear with whatever lies around.
Tribe Traits - The armies of Sauron are trained to utterly destroy and dominate their foes. How they do it is left up to them. The Orc tribes populating Mordor have developed specialized methods for decapitating, bludgeoning, disemboweling, etc., so that no Uruk is ever without a way to kill:
- Dark Strikes (Dark Tribe) - Uses deadly curved blades to deal a series of quick, brutal strikes.
- Terror Chains (Terror Tribe) - Lashes out with long chain weapons, damaging everything caught in their sweeping strikes.
- Machine Hook (Machine Tribe) - Throws a chained hook at opponents and pulls them in, dealing heavy damage.
- Warmonger Clash (Warmonger Tribe) - Locks Talion's weapon in place with their armored gauntlets, dealing extra damage with rapid blows.
- Mystic Blade (Mystic Tribe) - Uses the power of shadow to appear next to Talion, striking with a deadly Morgul Blade.
- Feral Claws (Feral Tribe) - Tackles and brutalizes Talion with massive claws.
- Hail of Bolts (Marauder Tribe) - Wields two crossbows at once to fire a hail of stunning bolts at opponents.
- Slaughter Cleavers (Slaughter Tribe) - Throws sharp cleavers in quick succession, causing bleeding wounds
- Bolas (Outlaw Tribe) - Throws a bola that ties down enemies, immobilizing them.
Convention in Identity
In Shadow of War, a Nemesis's complete set of traits are summarized into an identifier under their name. The order of these identifiers are:
1. Element of Weapon (if there's any).
2. Tribe/Status as Undead.
3. Advanced Class (Or their basic Class if the Nemesis lacks Advanced Class).
Thus, as an example, if an Uruk is of the Terror tribe, has a Cursed weapon and is a Slayer, his identifier would be Cursed Terror Slayer.
Game Mechanics
Talion can interact with and manipulate the Nemesis System in various ways to achieve certain goals.
- Gathering Intel - When a new Nemesis enter the Nemesis System and had no interaction with Talion, they will be represented by a silhouette in the System with no information about them. In Shadow of Mordor, Talion can Dominate any Uruk to get information on these unknown Nemeses. However, Talion does not get the traits of a Nemesis from interrogating regular soldiers who only provides the name, power level, and location of the Nemesis. Talion can only get the trait information from a Captain, an intel drop, a saved outcast that can be spoken to, or a Worm. Talion can only get intel on a Warchief from Captains or Worms.
- Interference - The Nemeses will sometimes go off to do missions on their own and Talion can go to their locations to interfere with these tasks. It is up to Talion if he wants to prevent, or allow the Nemesis to succeed these missions. Usually, if the Nemesis succeeded in their mission, they grow in power and if they fail, they either die or flee. This can prove to be a great way of influencing the growth or downfall of certain Nemeses.
- Death Threat - After obtaining the Death Threat skill, Talion can dominate any Uruk, and have him deliver a Death Threat to a Nemesis. Death Threats to Warchiefs may only be made through a Captain. This will make the threatened Nemesis stronger and lead him to surround himself with more gang members, but also increases Talion's chances to gain epic runes for defeating him, which for Captains is otherwise impossible.
- Initiation - Talion can get a Captain to become a bodyguard for a Warchief by making the Captain do an initiation rite to prove his worthiness to the Warchief. The mission type is Trial by Ordeal and Talion can interfere with the initiation to ensure or prevent the Captain from joining the bodyguard of the Warchief.
- Dominating Soldiers - By dominating soldiers and allowing them to live, they might enter the Nemesis System already under your control. If the System has an open Captain position and time is advanced either through death or Forge Tower, an unknown Captain immediately reveals himself under Talion's control. If a player wants to have new Captains under Talion's control with minimal effort, consider this tactic.
- Mission Creation - After Dominating a Nemesis, Talion can order the Nemesis to start up a Mission against another Nemesis at any time. Talion can then focus on increasing his dominated Nemesis' power level, by helping the Nemesis complete these Missions. The Dominated Nemesis can also draw out Warchiefs, if prompted to, but only if that Nemesis is a member of the Warchief's bodyguard (thus an Initiation must be performed first).
- Dying - Talion could purposely fall to his enemies to quickly raise the power of the killer within the Nemesis System. He can continually die to a particular Nemesis to consolidate how powerful that certain Uruk gets. This way, Talion can either Dominate him for a powerful servant or kill him for a powerful rune.
Missions and Events
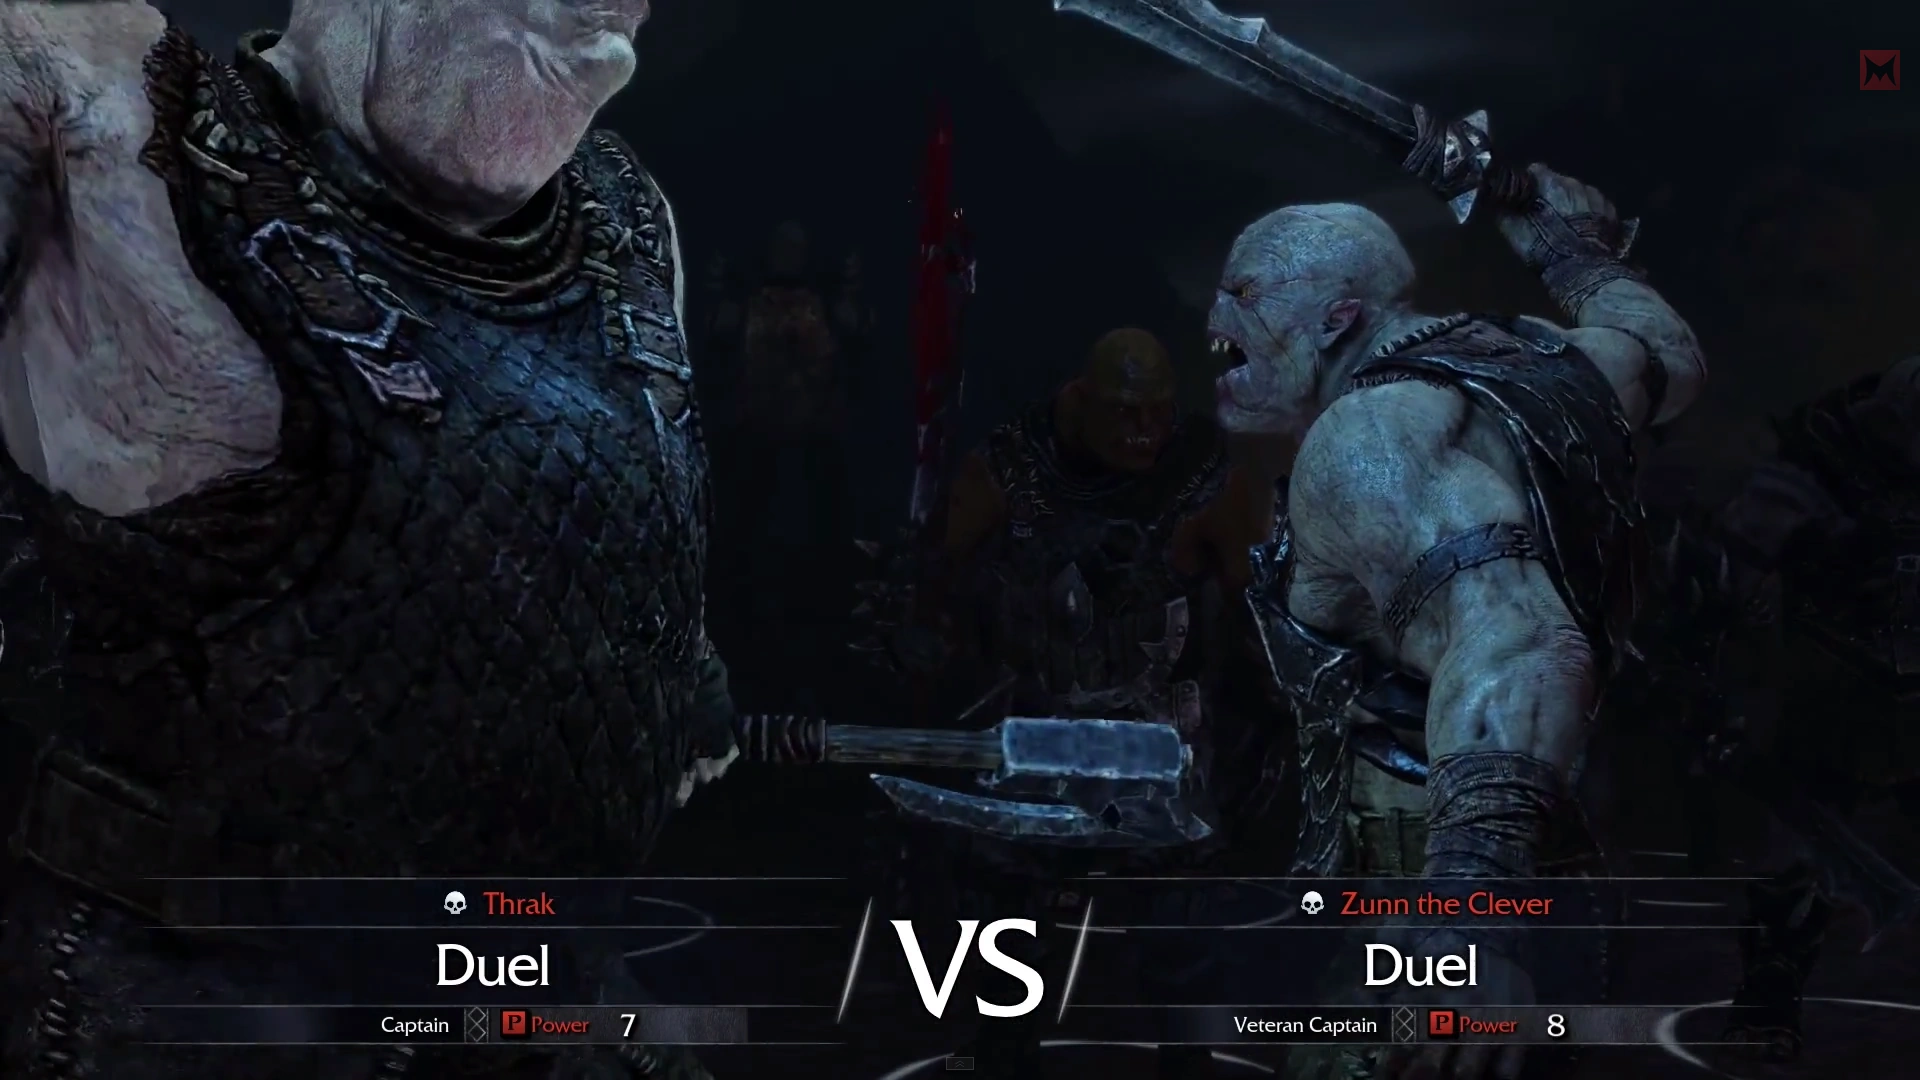
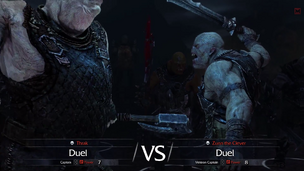
A duel between a Soldier and a Captain.
Also known as Power Struggles, these are the random missions and events that revolve around the Uruks dynamic hierarchy positions. These are triggered by interacting with the mission marker on the Main Map. As long as the mission's objective is completed, Uruks will gain Power levels, even if Talion is the one who manipulated the outcome.
- Promotion - An Uruk Soldier enters the Nemesis System to become a Captain. After occupying a space on the bottom row of the Sauron's Army screen, either by killing the previous Captain, or taking up the unoccupied space, he gains a title and new armor. From there, the Captain will attempt to go up into higher roles by either occupying an empty space on a higher row, or fight another Captain for that spot. Usually newer Captains are much weaker than those who have experience in the System, yet may be useful for easy domination or easy fodder for other Captains to level up on.
- Duel (Riot, in the case one or both of the Nemeses is a Warchief) - One Nemesis battles another Nemesis in an attempt to gain more power. The Nemeses goes one on one with their followers cheering them on. If one or both of the Nemeses is a Warchief, their applicable bodyguards will also be present to battle as well. The losing Nemesis may flee the battle if not killed, by either the other Nemesis or Talion, which allows him to continue in the System. The victor of the battle will gain a power level. If Talion decides to join in on the fight and kills off one of the Nemeses, the survivor still gets the power level. The more cowardly Uruks might not die from this because they fled the battle. These can be useful for drawing out Warchiefs because they appear on the map if this is prompted, without needing to complete a mission to lure the Warchief out. Also note that if the player wishes their branded Warchief to win a Riot, it is important to press the button that commands all nearby Branded Uruks to aggressively attack (specific button dependent on gaming platform), otherwise on occasion the player's Warchief will be attacked aggressively, outnumbered, and killed by multiple enemies (including the target), while the player's Dominated soldiers may sometimes stand by idly.
- Betrayal - A Warchief's bodyguard betrays the Warchief in attempt to take his rank. This can only be accomplished through domination, as bodyguards are loyal to the very end. The betrayer and his followers will fight all of the Warchief's, including any "loyal" bodyguard Nemeses. There is a good chance that the betrayer will die if he fights multiple Nemeses without help. If Talion decides to interfere and kills the Warchief, then the initial betrayer will gain a power level and become the new Warchief immediately. If the betrayer dies, the Warchief becomes stronger and gains a power level. Ordering a dominated bodyguard to perform a Betrayal is a much quicker tactic for drawing out a Warchief than doing the actual Warchief mission. If all of the Warchief's bodyguards are dominated, then the betrayal mission will take place out in the wild instead of in a Stronghold, between only the Warchief and his traitorous bodyguards.
- Recruitment - A Nemesis and a few of his followers attempt to gain new followers by killing several resistant groups of Uruks. After the few who resisted are killed, the remainder joins up with the Nemesis. The Nemesis and his new followers then move on to the next group where they repeat the process. Each of these fights will involve the Nemesis fighting alone against the belligerent Uruk soldiers. If the Nemesis successfully does this three times in a row, they gain a power level. If Talion intends to defeat and Brand or kill a strong Nemesis performing a Recruitment, it is advisable to wait till the second or third fight, where the Nemesis may already be wounded; however, this also means he will also have a larger number of followers present in the form of fresh recruits.
- Execution - A Nemesis might decide to execute another Nemesis and his followers. The executioner will line up the victim with 3 of his followers, on their knees, and execute them one by one, the victim being the last one. The followers of the executioner will watch from a short distance away cheering their leader on. If Talion decides to kill the executioner, the surviving Nemesis powers up instead. If the execution is successful, then the executioner gains a power level. It is possible for there to be no Nemesis to execute, in which the executioner Nemesis will simply put four common soldiers to the sword. When Commanding a high-level Branded Captain to murder an enemy Captain of a significantly lower Power Level, this most often results in an Execution instead of a Duel (with the higher level Captain performing the role of executioner). A Nemesis who is the victim of an Execution event will be stationary on his knees, with very low health, which means that if the executioner and his troops are already friendly, this makes it possible for Talion to immediately effortlessly grab the enemy Nemesis and either kill or dominate them if so desired.
- Feast - A Nemesis is in the midst of celebration with his followers, which means there will be a lot of grog barrels placed throughout the feasting area, making this a great window for taking down a Nemesis through explosions or grog poisoning. There are a good number of enemies in the area, but they are mainly in groups. It is perfect for well placed fire arrow explosion shots, or quick draw archers, to take them out quickly. If the feast goes by uninterrupted, the hosting Nemesis gains a power level.
- Trial by Ordeal - The Nemesis is pitted against a beast of Mordor to show off his power to the other Uruk. He will fight alone against a Caragor with his followers watching from a distance. If he is successful in the kill, he gains a power level. If unsuccessful, he will either die or survive and perhaps gain a fear of the creature. Talion can get involved by either killing the beast to let the Nemesis gain the power level, or kill the Nemesis while he is distracted by the fight. If the nemesis is under Talion's control, Talion can dominate the beast, causing both refuse to fight each other; in this case, no harmful or beneficial traits are gained, and no change in Power Level occurs. In Shadow of War, another nemesis and his grunts can intrude, attacking the captain in the trial.
- Beast Hunt - Similar to a Trial by Ordeal, only instead the Nemesis battles a pack of Caragors/Ghuls or a single Graug with some of his followers. Success brings power. Failure brings death, or emotional trauma.
- Ambush - A Nemesis fights another Nemesis, similar to a Duel, however one Nemesis and several of his followers will face waves of opposing Uruk. After the second wave of Uruk, either a much larger wave of Uruks or the opposing Nemesis will appear with the wave. Typically, the ambushing Nemesis will win, but if Talion gets involved that might change. If the ambushed Nemesis survives or does not flee, he will gain a power level. It is possible for the ambush to have no attacking Nemesis, and the defending Nemesis has to fight off a few waves of common Uruk soldiers to succeed. If Talion brands the ambushed Uruk Captain, and the Uruk Captain who initiated the ambush is already branded, then the ambush will immediately end the moment the branded captain shows up. Talion will be forced to defend the newly branded captain until the ambushing captain shows, and previously branded Uruk soldiers that are attacking the previously unbranded captain will now be marked as targets. In Shadow of War, a third party, led by another captain, might ambush the ambushing party, creating a three-way conflict.
- Survived - If a Nemesis survives an encounter with Talion (even if they don't fight), the Nemesis gains a power level.
- Death - What happens to a Nemesis after he "dies" in the System is mainly dependent on the way he was killed. If the Nemesis retains his head after "dying", there is a chance that he might have actually survived, and return unexpectedly with scars, sackcloth bag and strings wrapped around his head, metal plates on his skull, or some combinations of thereof. He can return multiple times as long as his head was not cut off. If the head is cut off then that particular Nemesis will never return, and he is represented in the Nemesis System as a severed head on a spike (instead of a corpse), serving as an indicator that Talion has guaranteed the permanent elimination of that particular Nemesis. This is most effectively ensured by Wraith Finisher or Lethal Shadow Strike, while Executions provide a good chance of ending in a decapitation. In Shadow of War, the amount of possible deaths increases, with Nemeses being swarmed by Morgai Flies, frozen, poisoned, burned, and cleaved in two. However, with every death there can be a survivor. If the nemesis was swarmed, they could be a living hive. If the nemesis was poisoned, their face could be deformed and partially melted. If the orc was cleaved, they come back as "The Machine", with a prosthetic arm and leg.
- Kills a Caragor/Graug - When a Nemesis slays a Caragor or Graug, even when he is not involved in a Power Struggle, he will gain a Power level for each one he slays. Be wary of this, as this can be a good way of making a Nemesis powerful quickly.
- Killed You - Talion was dealt a killing blow by a Nemesis, or soon-to-be Nemesis (common soldier), which increases their power level. Other Nemeses that survived the encounter with Talion will also gain power levels when this happens as well. If the killing blow was done by a soldier, he enters the Nemesis System as a newly-minted Captain.
- Fought You - Occasionally, a soldier will be promoted to Captain whose identity is already known, in which case they will be given new armor and/or weapons, with only their new traits unknown. The same can also occur for branded soldiers, adding unexpected new allies to Talion's army.
- Shamed - In Shadow of War, a new ability allows Talion to shame an Uruk or Olog, giving them a permanent burn-scar on their head in the shape of his hand. Usually this results in a decrease in power level, making them weaker, losing strengths. However, the nemesis can also gain power level in certain cases, being unashamed and taking the scar with pride. Later on, a nemesis can be deranged, sucking out their personality. This could result in constant repetition of a word or phrase ("It's your fort", "I knew it", "Tasty", "Love me! Love me!"), the lost of speech and only communicating in whimpers and moans, or becoming a maniac.
List of Names and Titles
Nemeses are randomly named and given a title appropriate to their appearance, traits or past actions. Any of the names listed below can be combined with any title. Titles can be useful as they may tell the Nemesis' habits and behavior. Their first names can be chanted by drawing the Warchief out. (This list is not yet complete)
Names
| Akoth | Amûg | Ar-Baruk | Ar-Beka | Ar-Gul |
| Ar-Kaius | Ar-Karo | Ar-Pratu | Ashgarn | Az-Adar |
| Az-Bror | Az-Rans | Azdûsh | Azgrom | Bagabug |
| Bagga | Barfa | Baz (Unique) | Blorg | Bolg |
| Borgu | Bork | Brogg | Bruz (Unique) | Bûbol |
| Bûth | Dharg | Dûgz | Dûgza | Dûsh |
| Dûshrat | Feldûsh | Felgrat | Flak | Flogg |
| Folgûm | Garl | Ghâm | Ghash | Ghûra |
| Gimûb | Glûk | Golm | Gorfel | Gorgûm |
| Goroth | Grisha | Grom | Grûblik | Gruk |
| Gubu | Gûnd | Gûndza | Hoglik | Horhog |
| Hork | Horza | Hoshgrish | Hoshû | Hûmgrat |
| Hûra | Ishgha | Ishmoz | Kâka | Khrosh |
| Koth | Kothûg | Krimp | Krakhorn | Krûk |
| Kûga | Kugáluga | Lamlûg | Latbag | Lorm |
| Lûga | Lûgdash | Lûgnak | Mâku | Malmûg |
| Mogg | Mormog | Mozfel | Mozû | Mûg |
| Muggrish | Mûglûk | Mûzglob | Nákra | Nazdûg |
| Názkûga | Nazû | Norsko | Norûk | Ogbur |
| Ogg | Ogthrak | Olgoth | Olrok | Orthog |
| Pâsh | Pígug | Prâk | Pûg | Pûgrish |
| Pushkrimp | Râsh | Ratak | Ratanák | Ratbag (unique) |
| Ratlûg | Ronk | Rûg | Rûkdûg | Shag |
| Shágflak | Shaká | Skak | Skog | Skoth |
| Skûn | Snafû | Snagog | Takra | Târz |
| Thakrak | Thrak | Torz | Tûgog | Tûhorn |
| Tûkâ | Tûmhom | Tûmûg | Ugol | Ûgakûga |
| Ûggû | Ûkbûk | Ûkrom | Ûkshak | Ur-Dag |
| Ur-Edin | Ur-Lasu | Ur-Lisak | Ur-Masi | Ûshbaka |
| Ûshgol | Uthûg | Zâthra | Zog (unique) | Zogdûsh |
| Zûgor | Zûmug | Zunn |
Titles
| Archer Trainer | Ash-Skin | Bag-Head | Barrel-Scraper | Battle-Master |
| Beast Slayer | Beastmaster | Beserker Master | Black-Blade | Black-Heart |
| Black-Thorn | Black Tooth | Blade Master | Blade Sharpener | Blood-Axe |
| Blood-Dripper | Blood Guzzler | Blood-Lover | Blood-Mad | Blood-Storm |
| Bloodhound | Bloodlust | Bloodstoker | Bone-Licker | Bone-Ripper |
| Bone-Shaker | Bone-Snapper | Bootlick | Brain Damaged | Brawl-Master |
| Brawler | Bright Eyes | Broken-Shield | Cannibal | Caragor Fang |
| Caragor Slayer | Caragor Tamer | Cave Rat | Corpse-Eater | Corpse Grinder |
| Dead Killer | Dead Wood | Death-Blade | Deathbringer | Deathmonger |
| Desolation | Discipline Master | Drake-Killer | Drooler | Dwarf-Eater |
| Eagle Eye | Ear Collector | Elf-Slayer | Evil Eye | Eye-Gouger |
| Face-Eater | Fast Feet | Fat Head | Fear Lord | Fire-Brander |
| Firebelly | Flame Monger | Flesh Lover | Flesh-Lump | Flesh-Picker |
| Flesh-Render | Flesh-Rot | Foul-Spawn | Frog-Blood | Ghûl Keeper |
| Ghûl Lover | Giant Slayer | Giggles | Gold-Fang | Gore King |
| Gore-Tide | Graug Catcher | Graug Slayer | Grog-Burner | Grog-Maker |
| Guard Master | Halfling-Lover | Hammerfist | Head-Chopper | Head-Hunter |
| Heart-Eater | Hide Skinner | Horn Blower | Hot-Head | Hot Tongs |
| Iron Arm | Iron Mount | Itchy | Jaws | Jitters |
| Keen Eye | Learned Scribe | Lice-Head | Life-Drinker | Limp-Leg |
| Literate One | Lock-Jaw | Longtooth | Lucky Shot | Mad-Eye |
| Maggot-Nest | Man-Catcher | Man-Hunter | Man-Stalker | Meat Hooks |
| Metal-Beard | Metal Beater | Mountain Shaker | Night-Bringer | Oath-Breaker |
| of Lithlad | of the Black Gate | of the Blackguard | of the Maggots | of the Spiders |
| of the Stench | of the White Hand | of the Wind | One-Eye | Pain Seeker |
| Pit Fighter | Plague-Bringer | Pot-Licker | Pureblood | Quarter Master |
| Quick-Blades | Rabble Rouser | Raid Leader | Ranger-Killer | Ravager |
| Raw-Head | Rock Crusher | Rotbeast | Runny-Bowls | Sawbones |
| Scar-Artist | Shaman | Shield Master | Skin-Peeler | Skull Bow |
| Skull-Cracker | Skull-Lopper | Skull-Splitter | Slashface | Slave-Lover |
| Slave Taskmaster | Steward of the Keep | Stone-Hive | Stoneskin | Storm-Bringer |
| Sword Master | Taker of Heads | Taskmaster | the Accursed | the Advisor |
| the Agonizer | the Alchemist | the All-Eater | the Amputator | the Ancient One |
| the Angry | the Anvil | the Armorer | the Assassin | the Avenger |
| the Backbiter | the Bard | the Beheader | the Believer | the Biter |
| the Black | the Bleeder | the Bloated | the Bloody | the Blue |
| the Bone Collector | the Bowmaster | the Brander | the Brave | the Breaker |
| the Brewer | the Brother | the Brown | the Butcher | the Caragor Thief |
| the Caragor Trainer | the Catcher | the Champion of Gorgoroth | the Choker | the Chopper (unique?) |
| the Chunky | the Claw | the Clever | the Commander | the Complainer |
| the Cook | the Corruptor | the Coward | the Crazy | the Crippler |
| the Crow | the Cruel | the Cursed | the Crusher | the Dangerous |
| the Dark | the Dead | the Deathless | the Deep Seer | the Defender |
| the Defiler | the Destroyer | the Devourer | the Diseased | the Disgusting |
| the Dragon | the Dreamer | the Driver | the Drowned | the Drunk |
| the Dumb | the Dung Collector | the Eater of Men | the Elder | the Endless |
| the Enraged | the Ever-Wounded | the Executioner | the Faithful | the Fanatical |
| the Fearful | the Flesh Glutton | the Flogger | the Fool | the Forsworn |
| the Foul | the Friendly | the Funny One | the Gab | the Gambler |
| the Gentle | the Glutton | the Gluttonous | the Gold-Thief | the Golden |
| the Gorger | the Grinder | the Grizzled | the Grog Hoarder (unique?) | the Guardian |
| the Guardian of Mordor | the Gut Ripper | the Hacker | the Handsome | the Heartless |
| the Hell-Hawk | the Hook | the Humiliator | the Humongous | the Hungry |
| the Hunter | the Hurler | the Immovable | the Infernal | the Inscrutable |
| the Iron Willed | the Judge | the Killer | the Kin-Slayer | the Knife |
| the Legend | the Loaded | the Lookout | the Lucky | the Lurker |
| the Machine | the Mad | the Maggot | the Man-Eater | the Manhunter |
| the Map Keeper | the Marauder | the Meat Grinder | the Meat Hoarder | the Merciful |
| the Merciless | the Messenger | the Metal Beater | the Mindless | the Mountain |
| the Murderous | the Noble | the Obsessed | the Obvious | the Other Twin (unique) |
| the Pain Lover | the Painted | the Pathetic | the Pickler | the Pinch |
| the Poet | the Poisoner | the Pretender | the Prickler | the Proud |
| the Prowler | the Puny | the Quartermaster | the Rash | the Rat |
| the Raven | the Reckless | the Red | the Relentless | the Rhymer |
| the Ripper | the Ruinous | the Runner | the Runt | the Sadistic |
| the Savage | the Scholar | the Screamer | the Serpent | the Shadow |
| the Shield | the Shield-Master | the Shy | the Sick | the Sickly |
| the Singer | the Skinless | the Slasher | the Slaughterer | the Slaver |
| the Slippery | the Small | the Smasher | the Smuggler | the Sneak |
| the Snowflake | the Soothsayer | the Spear Master | the Spike | the Sprog |
| the Stinger | the Stout | the Strangler | the Strong | the Surgeon |
| the Suspicious | the Sweet | the Swift | the Tactician | the Tainted |
| the Tenderizer | the Thirsty | the Thunderer | the Timid | the Tongue |
| the Tower | the Tracker | the Trainer | the Tricky | the Twin (unique) |
| the Uncatchable | the Unclean | the Unkillable | the Venomous | the Vicious |
| the Vile | the Wall | the Wanderer | the War-Bringer | the Warden |
| the Warlock | the Warlord | the Warrior | the Wasp | the Watcher |
| the Weak | the Whiner | the Whisperer | the Wicked | the Wild |
| the Wise | the Wrath Breeder | the Wreck | the Wrestler | Thin Bones |
| Throat-Slasher | Thunder-Bowels | Thunderhead | Tree-Killer | Troll Slayer |
| Troll-Born | Ugly Face | Vat Keeper | Warmonger | Who Flees |
| Worm-Licker |
Lists of Strengths and Weaknesses
Strengths
Weaknesses
Trivia
- If an Uruk fought or killed Talion the most, he will appear in Lord of Mordor as Talion's main nemesis who rallies Uruks to fight against Talion and his 5 branded Warchiefs.
- Caragor pit fights may occur at Nurnen for regular Soldiers at a arena located in Fort Morn which can promote a Soldier to a Captain if he gets the last hit on the Caragor.
Gallery
")
")
| Uruks |
Sauron's Army • Uruks, the Great Orcs |
| Feral |
Caragors • Dire Caragor • Caragaths • Graug • Olog Graug • Horned Graug • Legendary Graug • Wretched Graugs • Ghûls • Ghûl Matrons |
| Other |
Hell-hawk • Mordor Rats • Morgai Flies • Morgul Bats • Ungol • Great Beast • Great Eagle • Barrow Wight soldiers • Deleted Creatures |